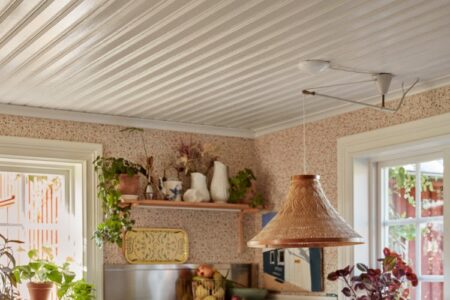
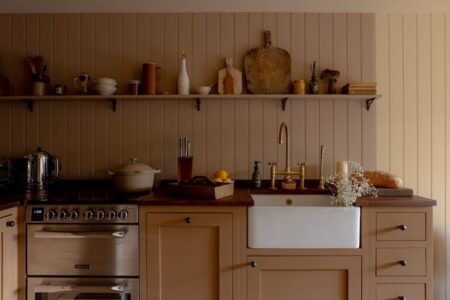
Texture, Warm Tones and Contrast in a Swedish Home
Texture, texture, texture. That’s usually my answer when someone asks how our Scandinavian friends manage to create such lovely homes in warm neutral tones. This Gothenburg apartment, for example, has…
Continue reading

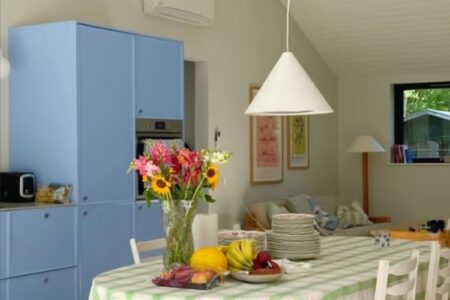
Golden Light and Design Pieces in a Swedish Apartment
Well, well, well — another week has rolled around, and it’s really starting to feel like spring here (it’s amazing how 7°C can feel positively balmy!). With that comes the…
Continue reading
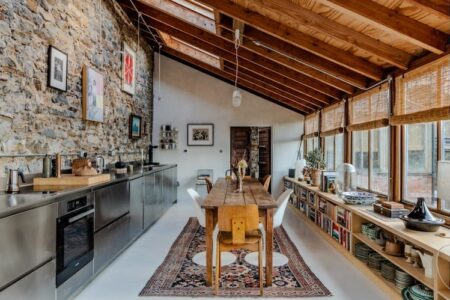
Where Time, Books and Light Meet
There’s that famous Patek Philippe line about never really owning a watch, just looking after it for the next generation, and I think the same can be said of houses…
Continue reading
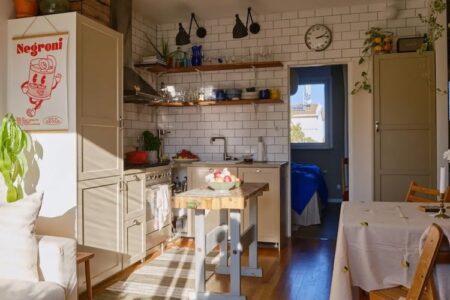
Where Colour Meets the Simple Danish Summer Life
Well hej there, friends! We’re back in snowy Malmö and dreaming of… summer. A dangerous game when it still feels so far away. But in the former Danish home of…
Continue reading
A Cosy and Simple Place to Unwind
I might need to rename this blog My Scandinavian Getaway. I can’t seem to stop sharing escapes that we can actually book. Sometimes I wonder if this little corner of…
Continue reading

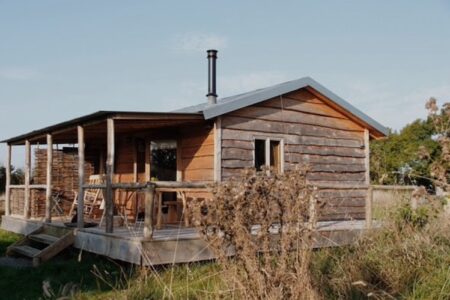
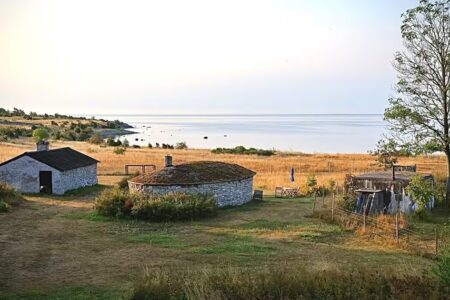
From Stable to Sanctuary in Tasmania
Hallo Freunde, I’m scribbling this from Frankfurt Airport, where I’ve spent the past couple of days exploring Ambiente (more on that over on my IG). As always, when travelling, the…
Continue reading
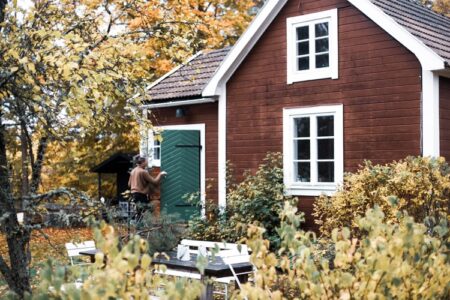
Autumn Charm at My Friend Helen’s Cosy Swedish Cottage
I was browsing Pinterest earlier, looking for a little inspiration, when an old photo suddenly popped up and whisked me straight back to the weekend I spent at my friend —…
Continue reading
An Old Tack Room, Reimagined for a Cosy Stay
I once heard that winter is meant to be a quiet reset — a season to lean into tiredness, keep warm, and stay cosy at home rather than fighting it.…
Continue reading
Old Meets New in an Artist’s Home in Devon
Calling all artists! Is it not a dream to live amongst sprawling grounds, a beautiful walled garden, and a very cool house – with space of your own to create?…
Continue reading
A Small Stockholm Space with a Playful Twist
I am always drawn to the opposite. Mention a documentary about climbing Mount Everest or another daring adventure and I’ve hit play before they’ve even put on their crampons –…
Continue reading

A Cosy Cottage Escape in the French countryside
Hello there friends, how are you getting on? I’m not going to lie, January in Malmö is not my favourite time of the year. The world is devoid of colour…
Continue reading
Two Dreamy Airbnb Cottages on the Swedish island of Gotland
It’s no secret that I absolutely love the Swedish island of Gotland. Granted, I’ve only been there once—when we sailed there on an East Coast tour and Per pretty much…
Continue reading

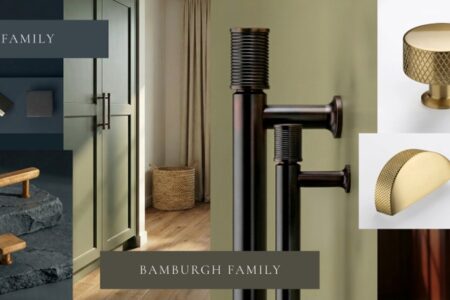
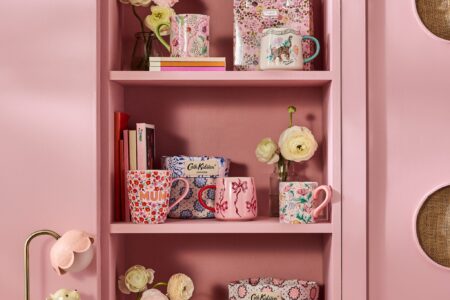
Heritage Brass Hardware for Modern Interiors
Crofts & Assinder are dedicated to creating heritage brass hardware for modern interiors. British interiors are experiencing a quiet return to character and heritage brass hardware is leading the way.…
Continue reading

Rugs Ready for the Great Outdoors
The entire Ecorugs Collection 2026 from Louis De Poortere can be enjoyed outdoors as well as in, thanks to their weather resistant and machine washable construction. When Louis De Poortere…
Continue reading
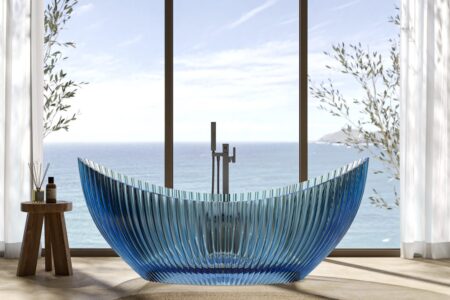
Acrylic, Translucent Resin and Walnut: Nôsa’s Material Direction for 2026 Bathrooms
Bathroom design continues to move beyond pure function, with 2026 pointing toward lighter forms, sculptural silhouettes and warmer, more tactile materials. As residential and contract interiors increasingly overlap, bathrooms are becoming…
Continue reading

Heimtextil 2026 sharpened its global market relevance by attracting more top-level decision-makers
With 148 participating nations, rising global relevance and a marked increase in visitor quality, Heimtextil 2026 stood for stability and reliability in a volatile market environment. Once again, 3,000 exhibitors…
Continue reading
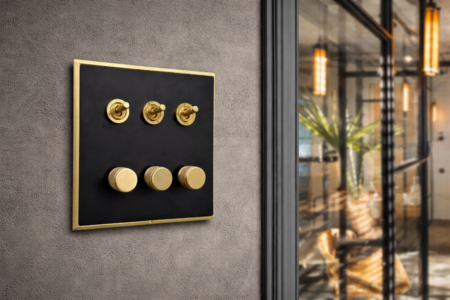
Hamilton Litestat: Where Technical Expertise Meets Design Excellence
Since 1968, Hamilton Litestat has been synonymous with British design excellence, combining technical expertise with an enduring commitment to craftsmanship. Trusted by architects and interior designers for over five decades, Hamilton continues…
Continue reading
Grounding the Future: The INDX National Flooring Show 2026
The INDX National Flooring Show is set to return to Cranmore Park, Solihull, on 10–11 May 2026, bringing a significant change in format that reflects the evolving needs of the independent retail…
Continue reading
INDX Home -the UK’s premier trade show dedicated to homewares and housewares
INDX Home is the UK’s premier trade show dedicated to the homewares and housewares sector. Curated by Associated Independent Stores (AIS), the UK’s leading retail and buying group, the event is specifically…
Continue reading

The 2026 Surface Design Show Announces Its Speakers Programme
The Surface Design Show has announced its speaker’s program for the 2026 edition of the show. Featuring a range of topics with some of the most innovative voices in industry,…
Continue reading

Surface Design Show 2026 champions the next generation of material innovators
Surface Design Show 2026 reaffirms its commitment to nurturing emerging design talent, placing material innovation, sustainability and future-focused thinking firmly at the heart of the show. Through its ongoing partnerships…
Continue reading
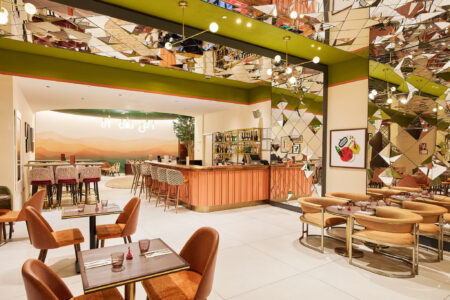
Experience, engagement and bespoke design: a new look for an iconic London hotel
Hospitality design specialists Jones AD have completed a new design for a restaurant and VIP lounge in The Cumberland Hotel – the iconic hotel with a rock and roll history…
Continue reading
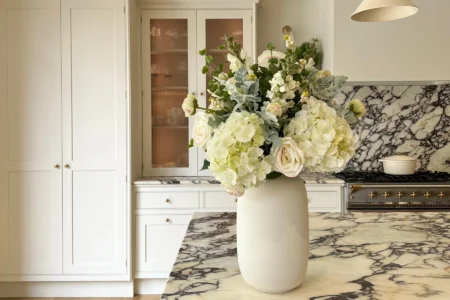
Artificial Flowers Capture 14% of UK Market as Designers Reconsider Specifications
New market analysis shows artificial flowers now command 14.3% of the UK’s £2.2 billion retail flower market, with growth rates significantly outpacing fresh flowers as quality improvements and environmental considerations…
Continue reading
INDX National Flooring Show: The UK’s flagship trade event for the independent flooring sector
The INDX National Flooring Show is the UK’s flagship trade event for the independent flooring sector. Rebranded from the Buying Groups National Flooring Show (BGNFS), it is organised by Associated Independent…
Continue reading