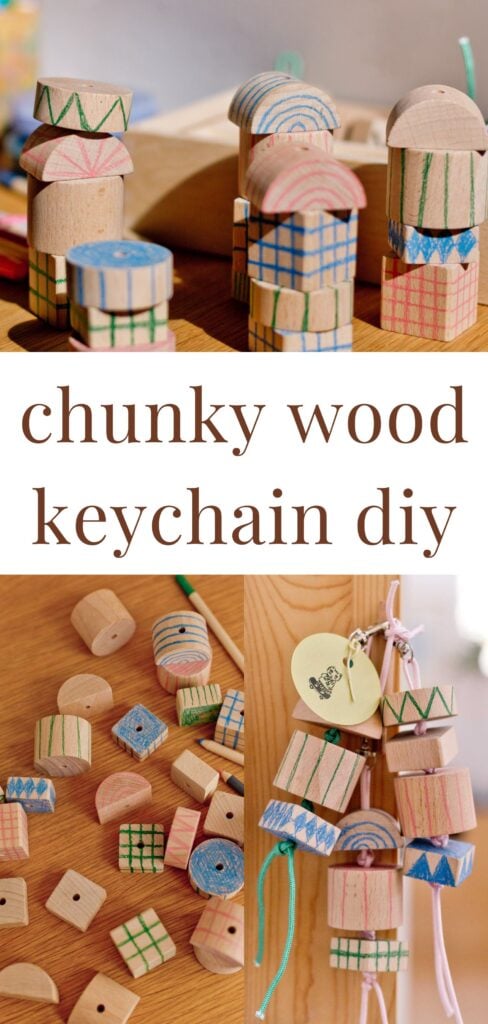
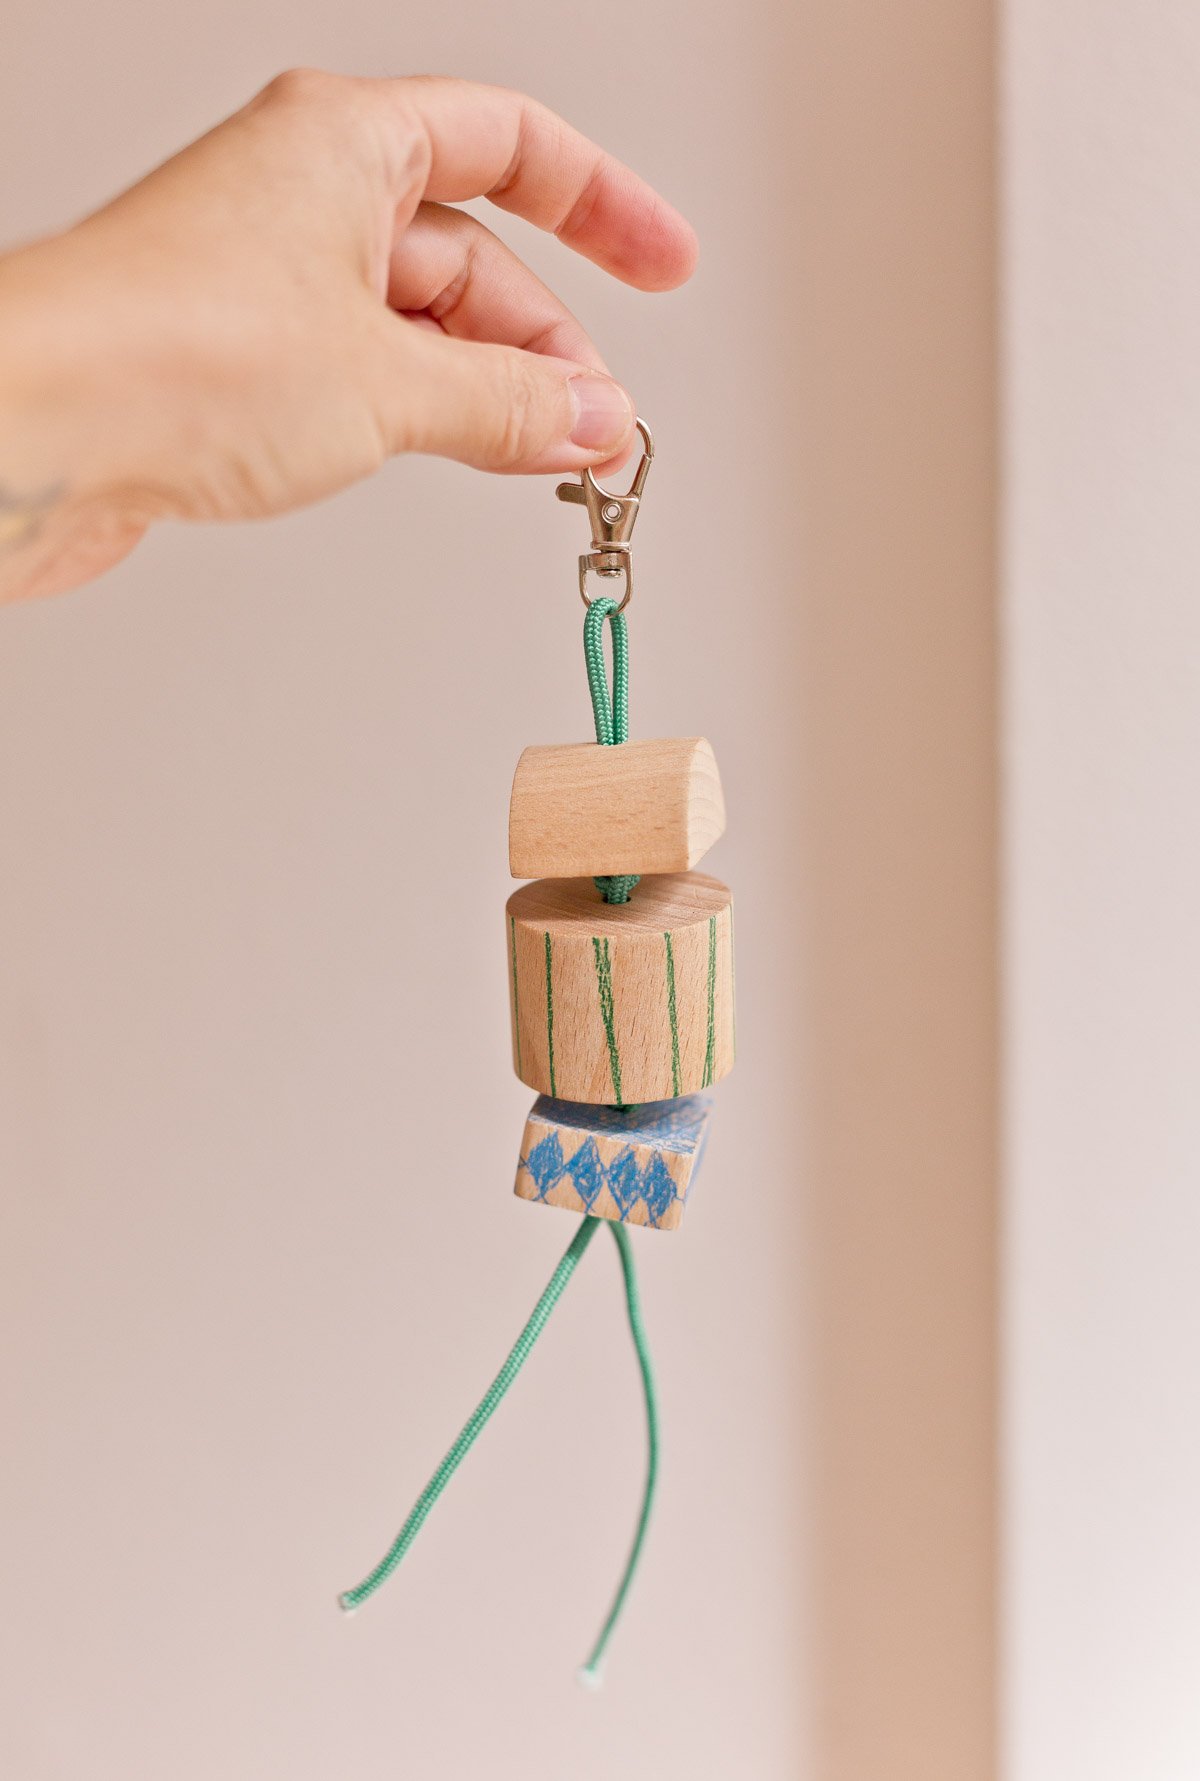
Here’s an easy project that would make a great gift for kids: a funky (and chunky) wood keychain filled with personality.
These wood block keychains are a fun DIY to try for back to school, Christmas gifts, stocking stuffers, even unique party bag fillers for birthdays. Something that kids could attach to their backpacks, lunchbox, or tote bag that will actually last!
I ended up making 8-10 of these pretty quickly (an hour or two) for a fundraiser at my son’s schools, featuring handmade items. They were affordable to get the supplies for and very easy to make. Win-win!
Along those same lines, I feel like these keychains would be a cute thing to sell at a craft fair too. A low-cost item that gets people checking out your booth. Anyway! Here’s how to make ’em…
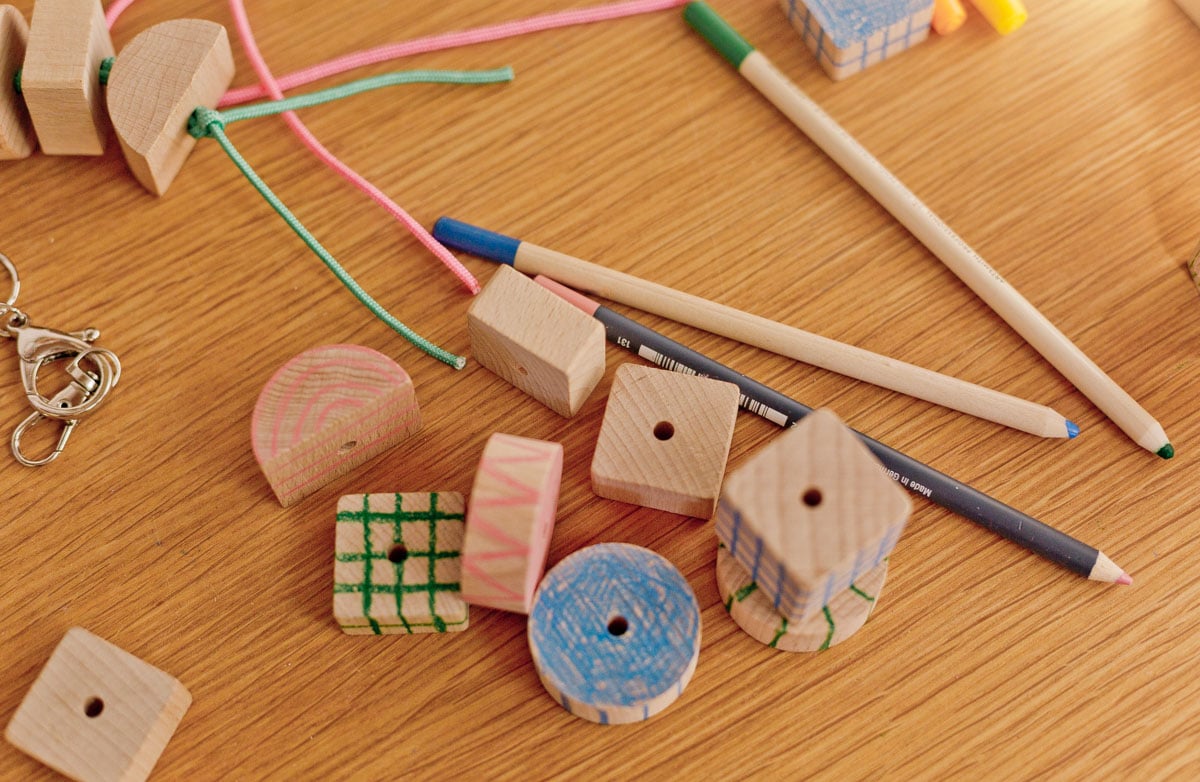
Supplies for DIY Keychain
- chunky wood blocks*
- thick keychain cording
- lobster clasp keychain parts
- colored pencils or paint (optional)
- sealant (optional)
- scissors
*If you use wood blocks that don’t already have a hole through the middle of them, you’ll need to drill holes in the blocks first, before getting started with this project.
How to Make a Wood Keychain
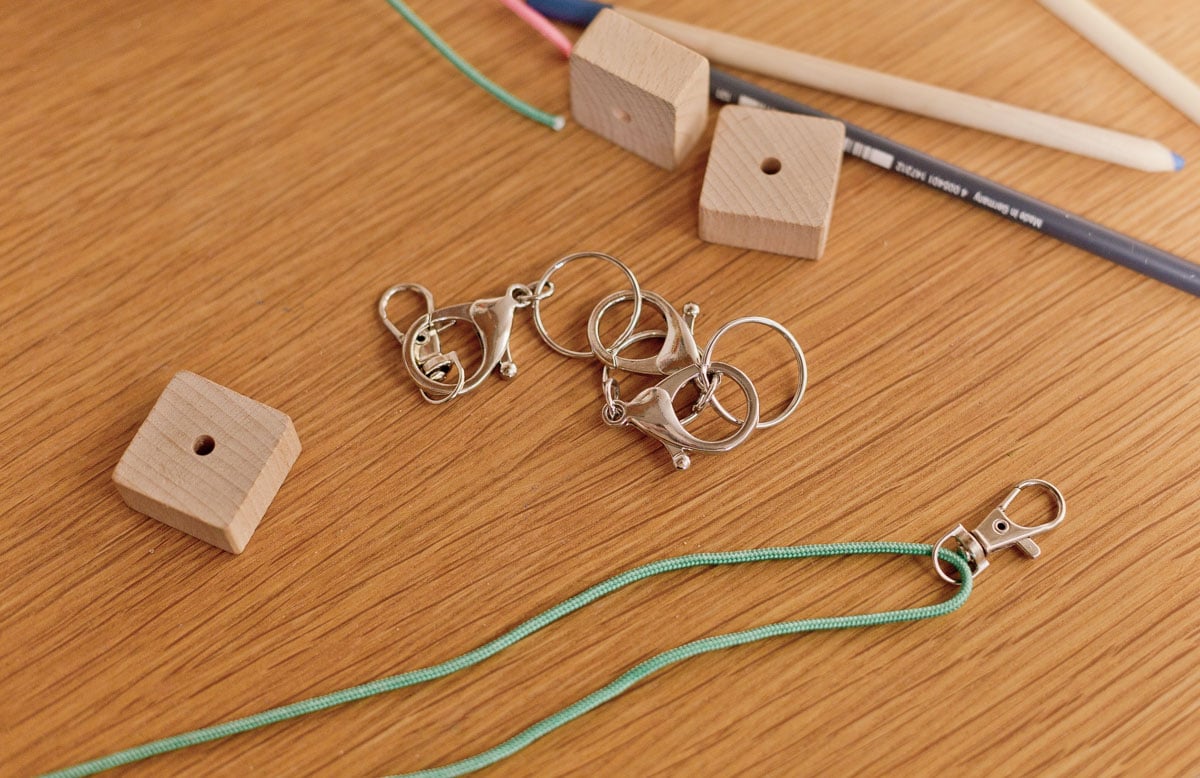
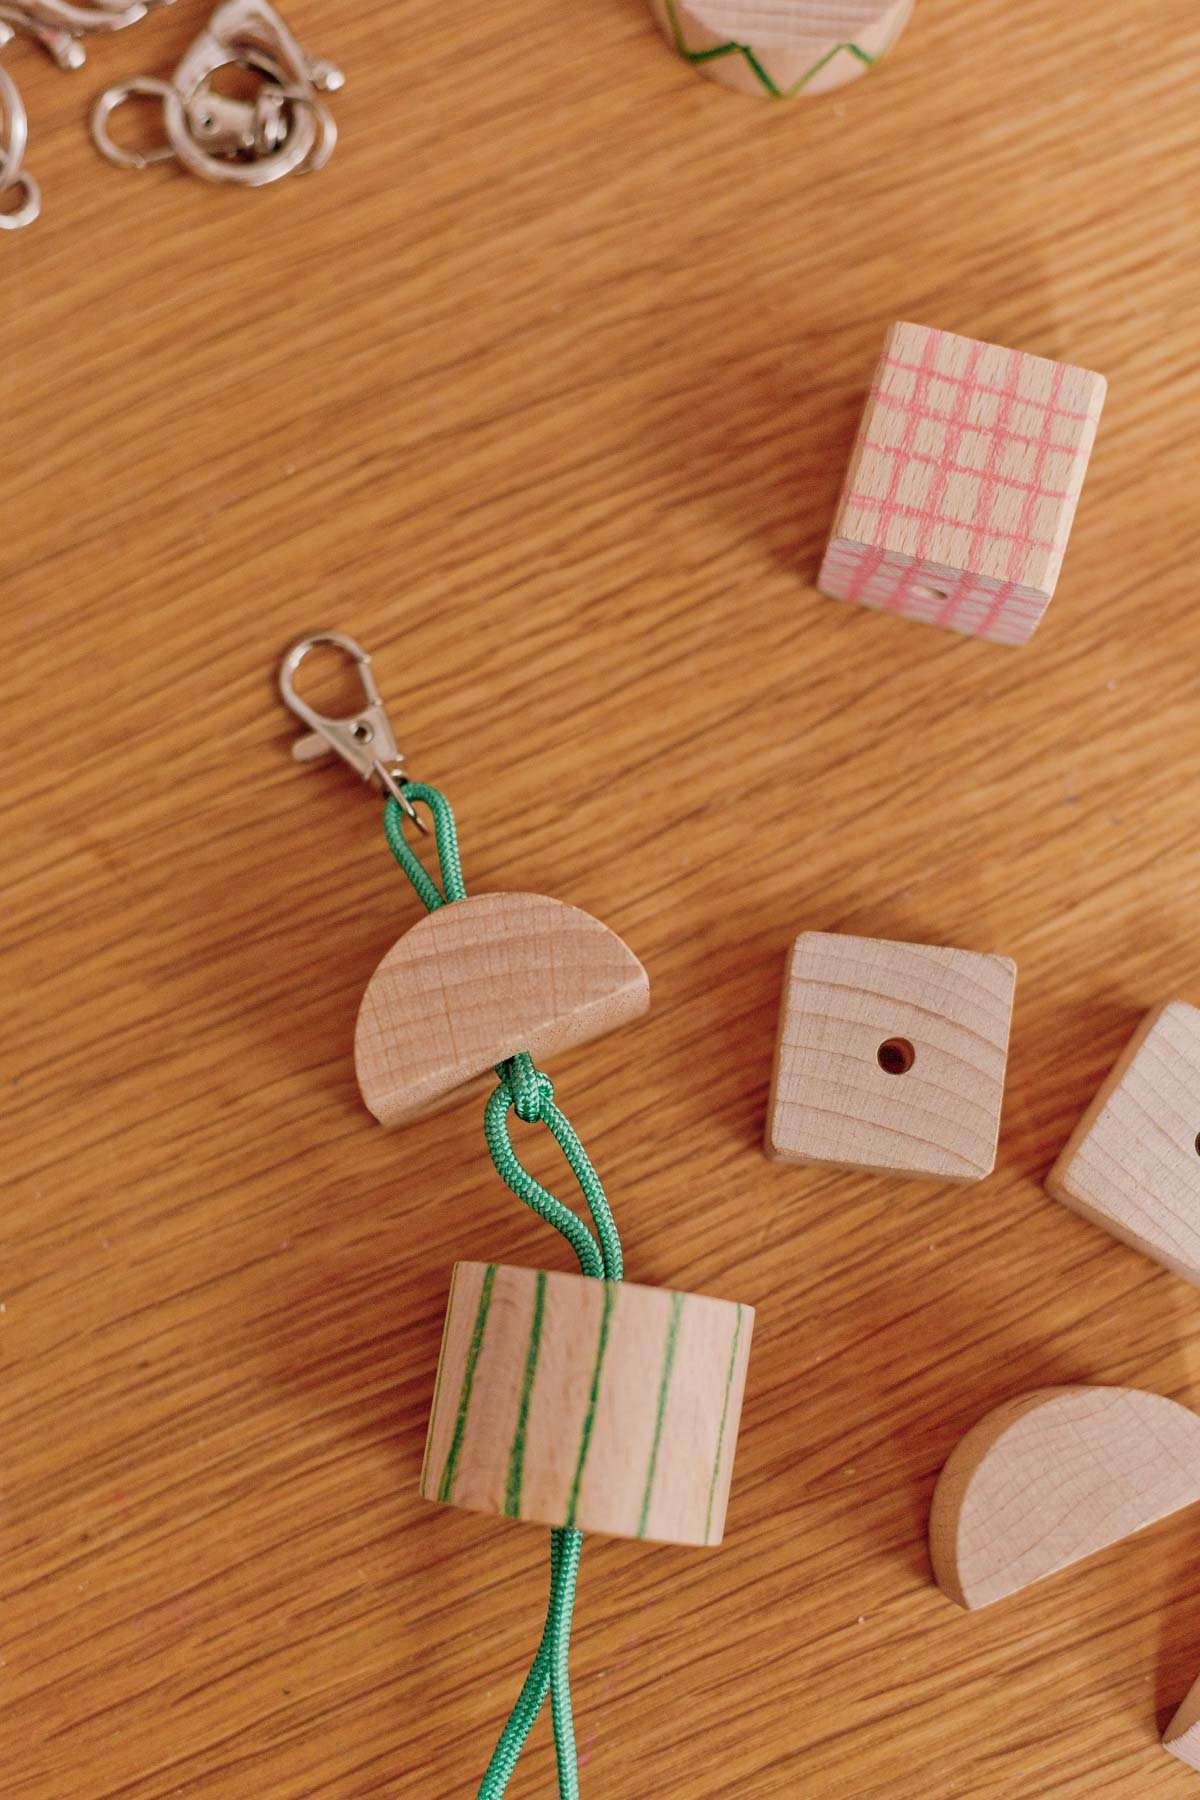
1. String a keychain clasp onto cord.
Making your own keychain is simple. Start by stringing a keychain clasp onto the cording, at the halfway point. So there is an equal length of cord on each side of the clasp.
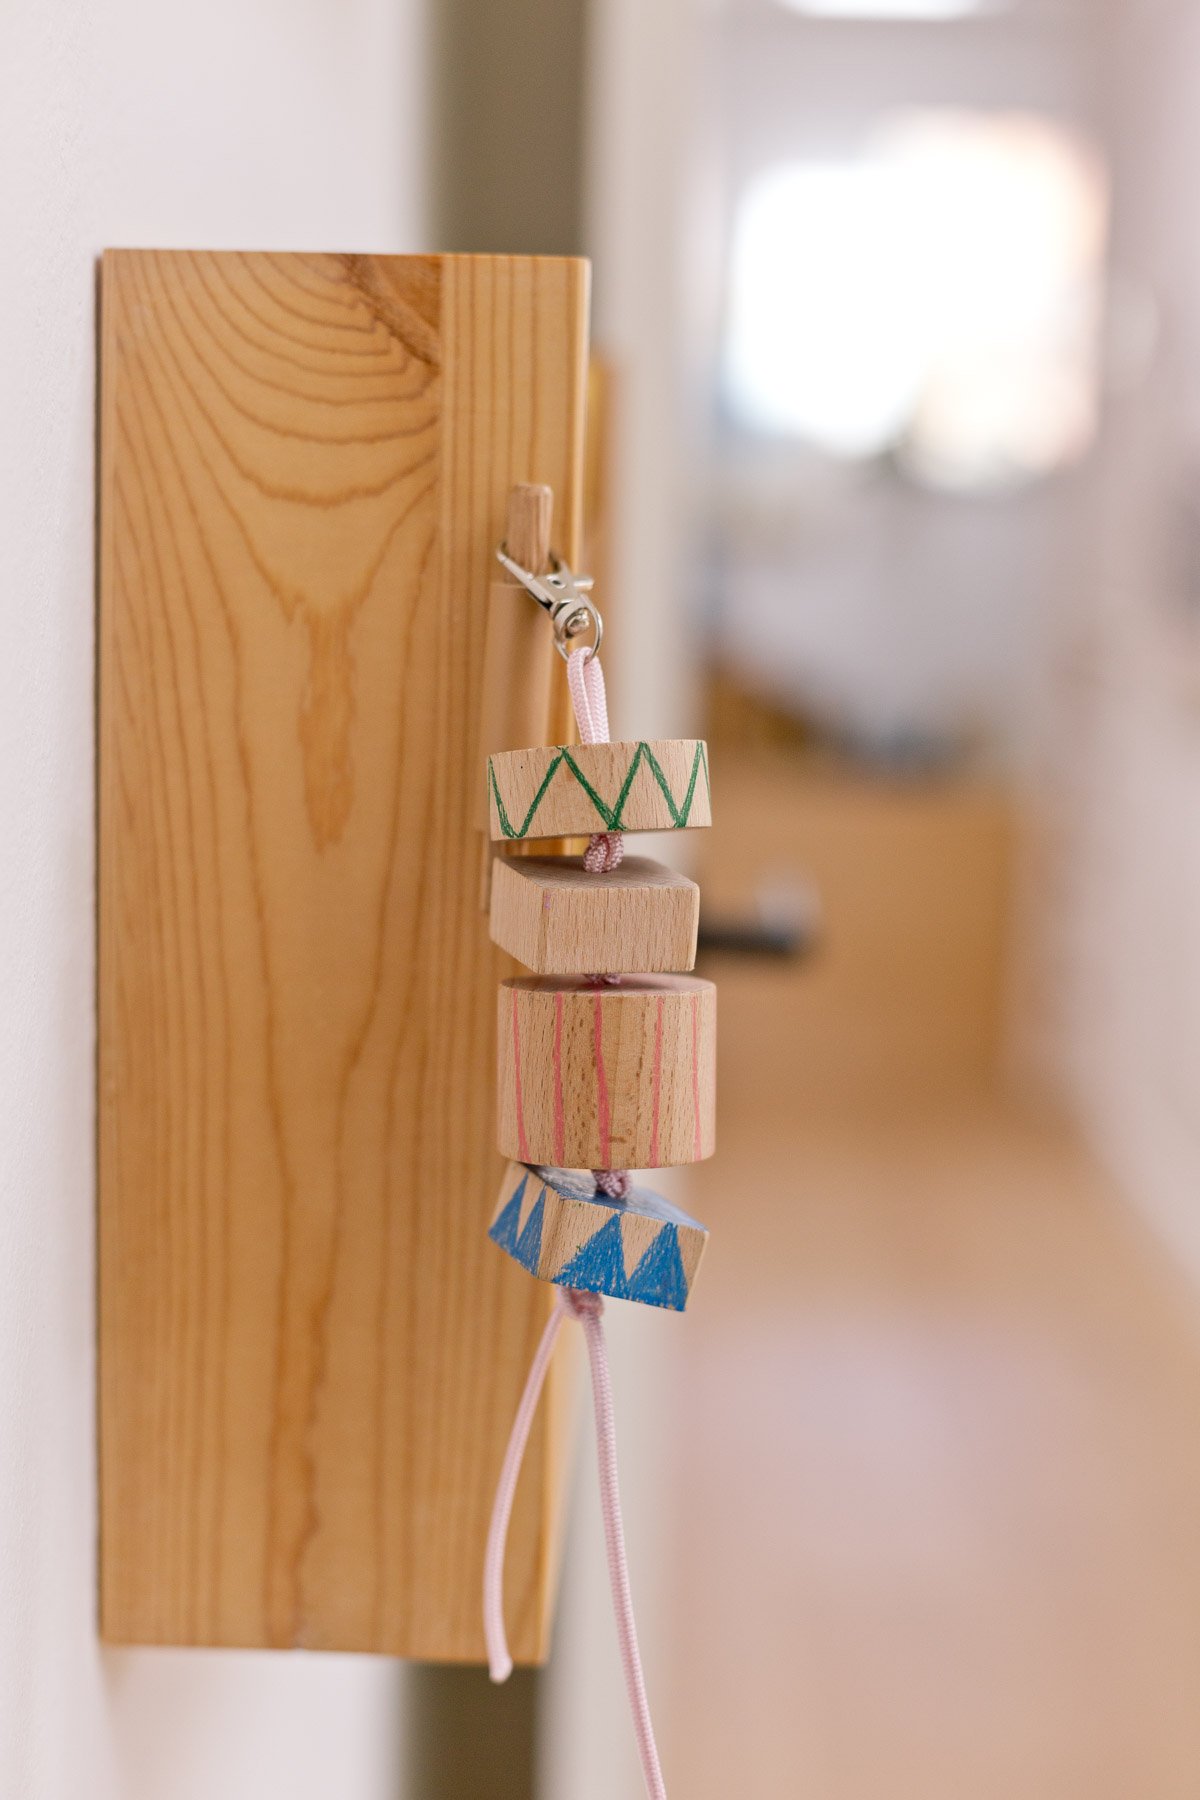
I have a few different sizes of these lobster clasp keychain parts, but the small ones are the ones I like most.
Set aside.
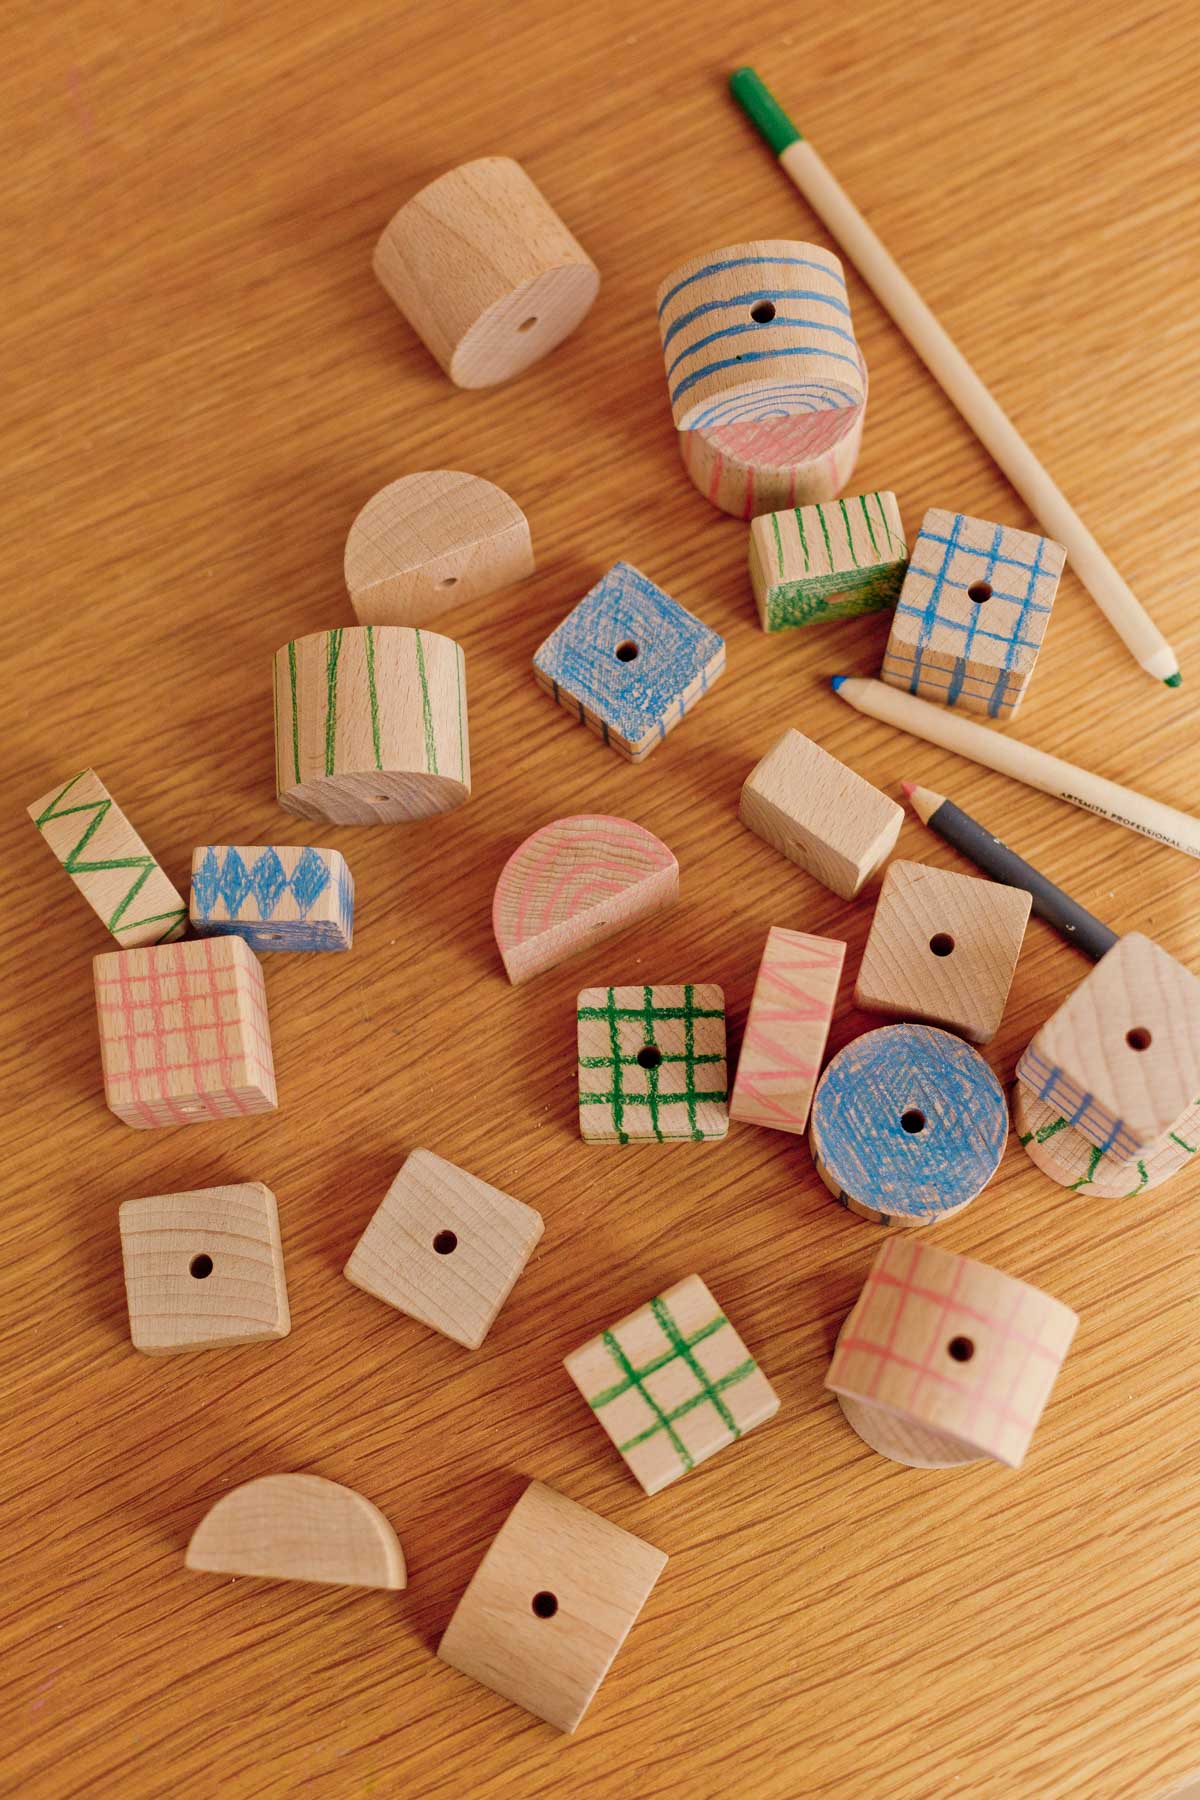
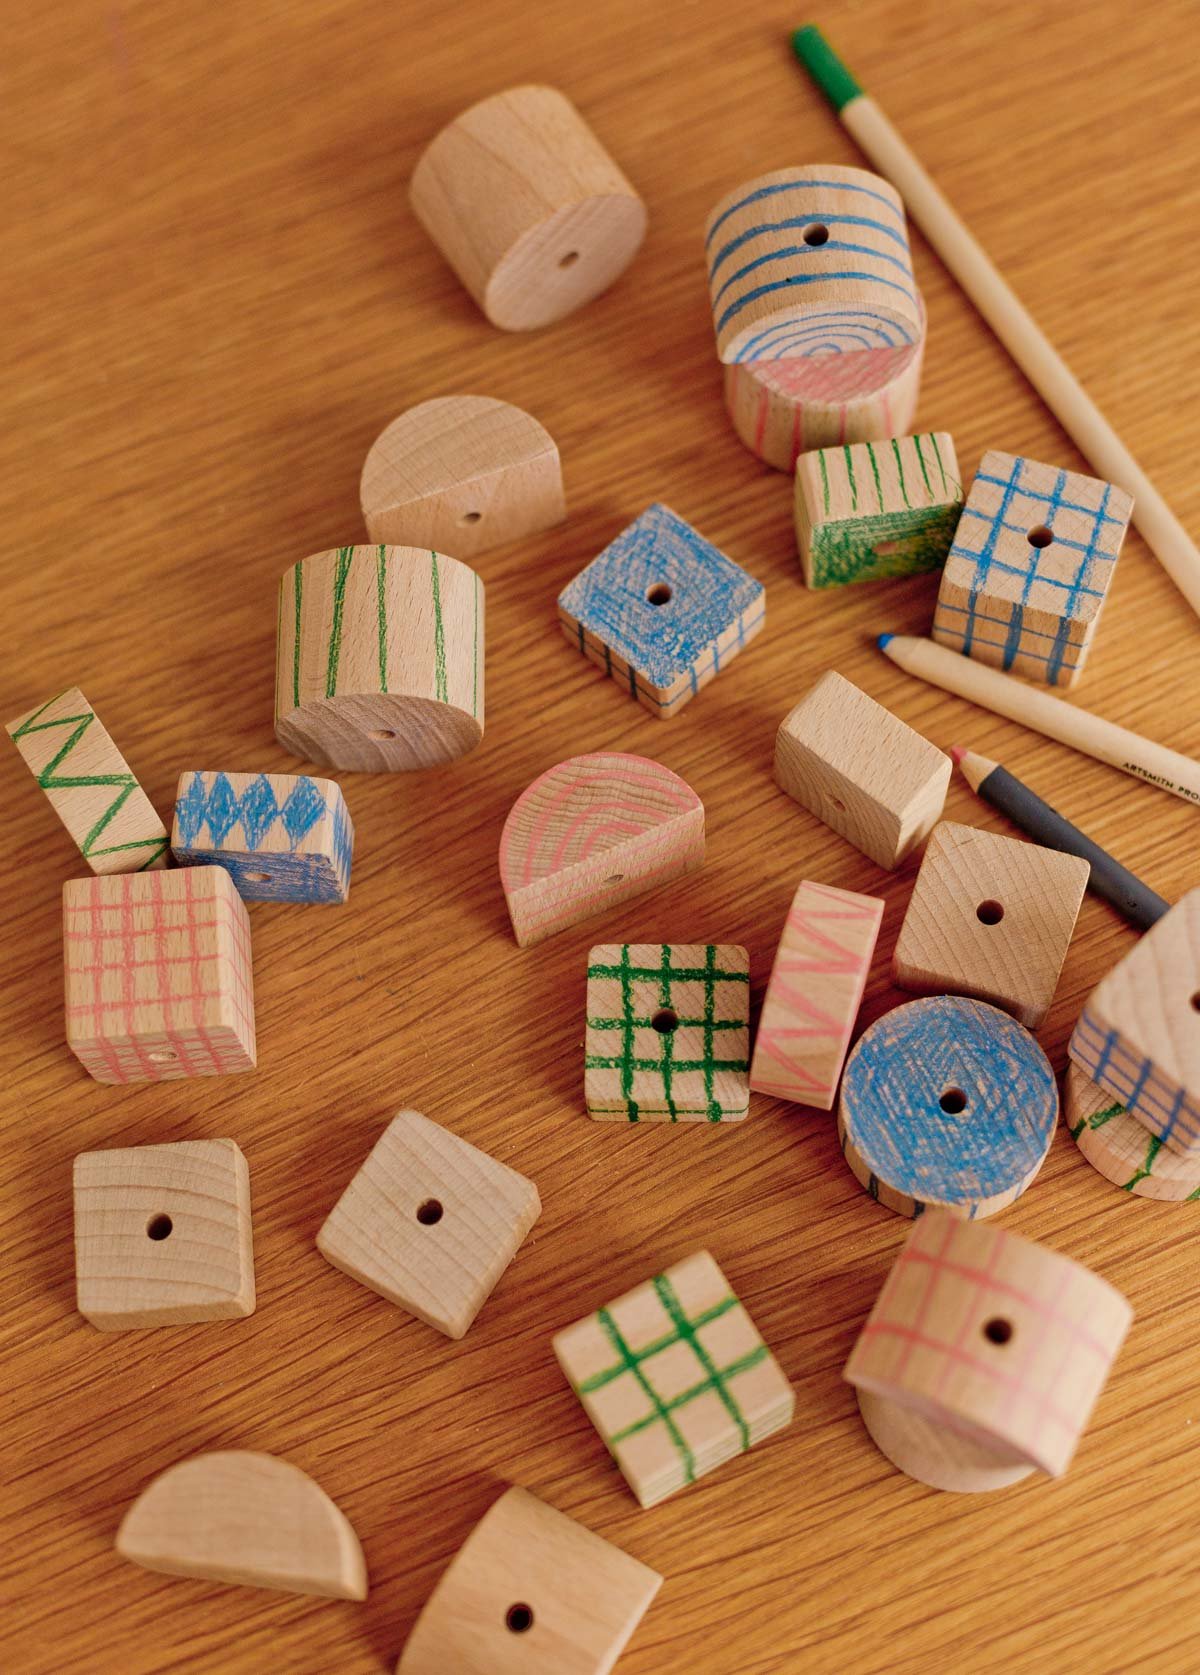
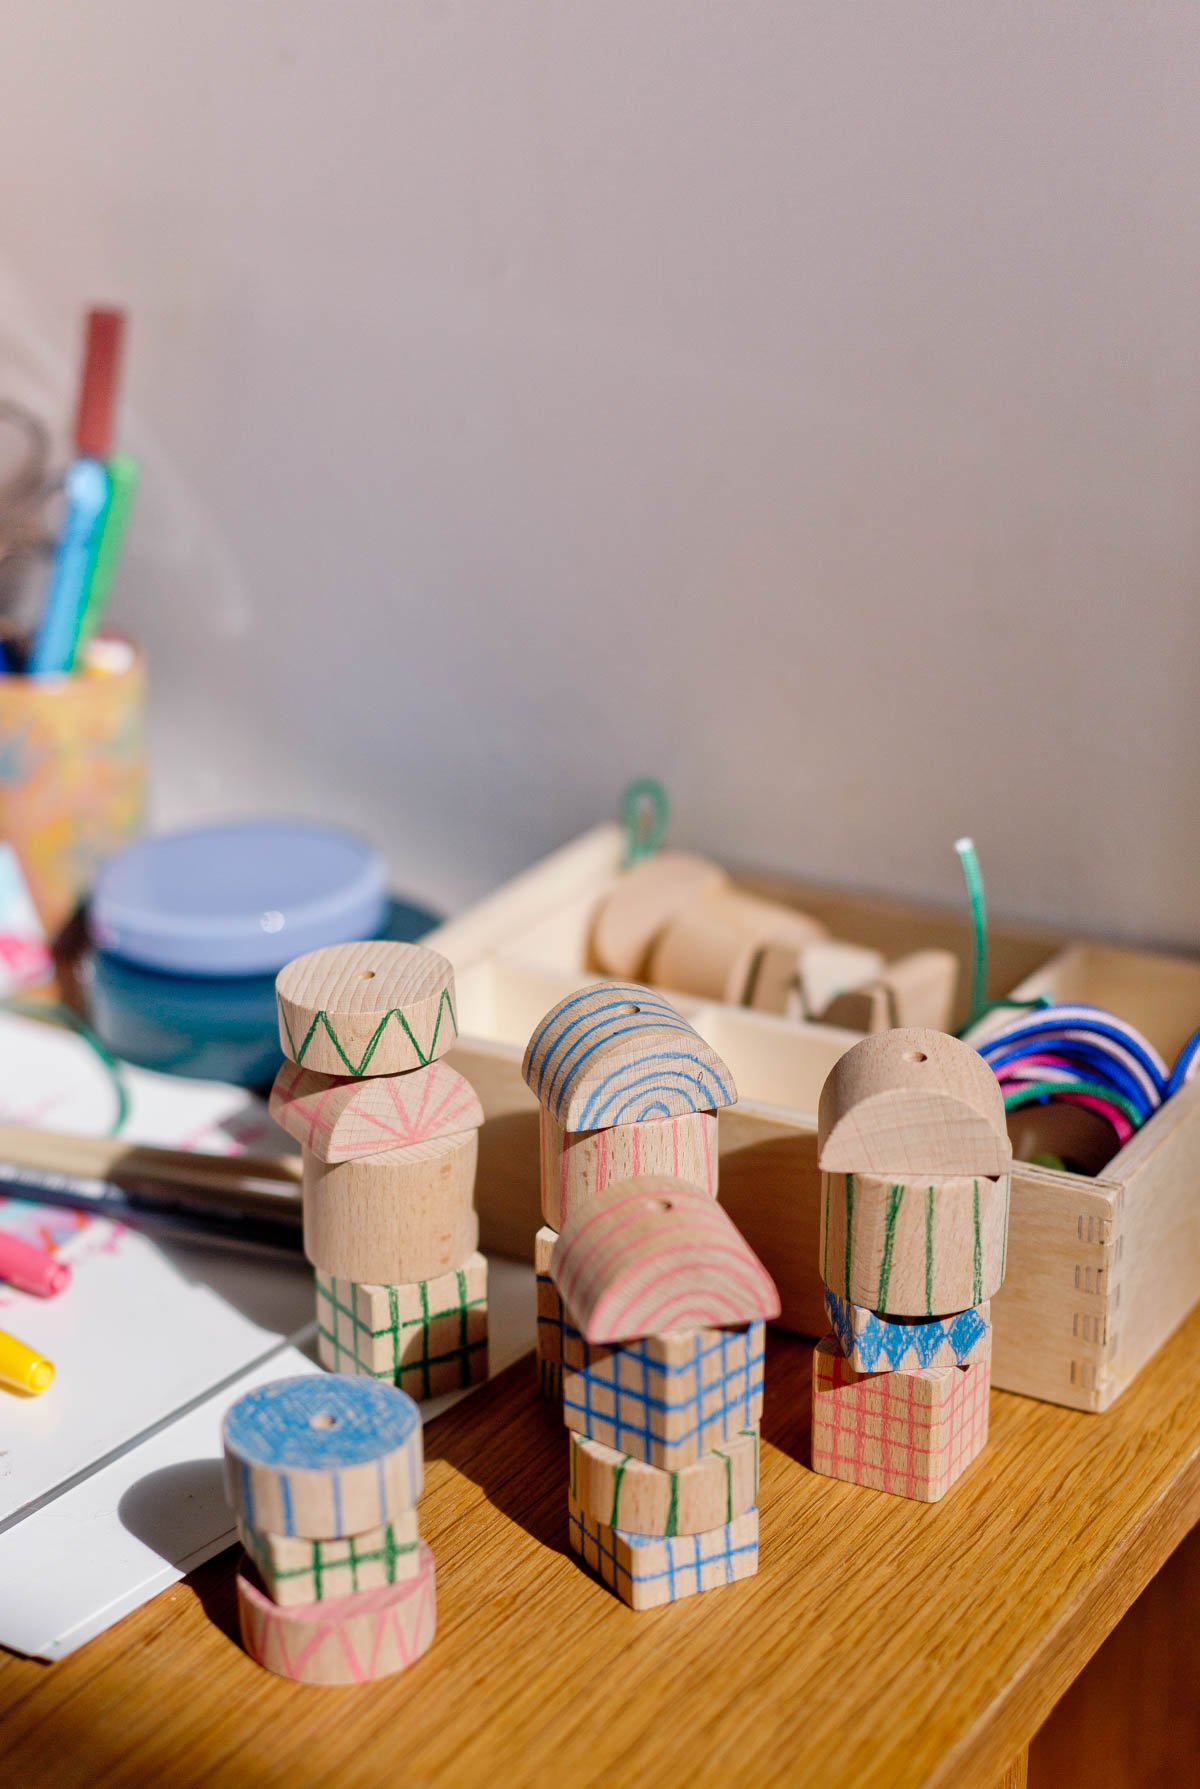
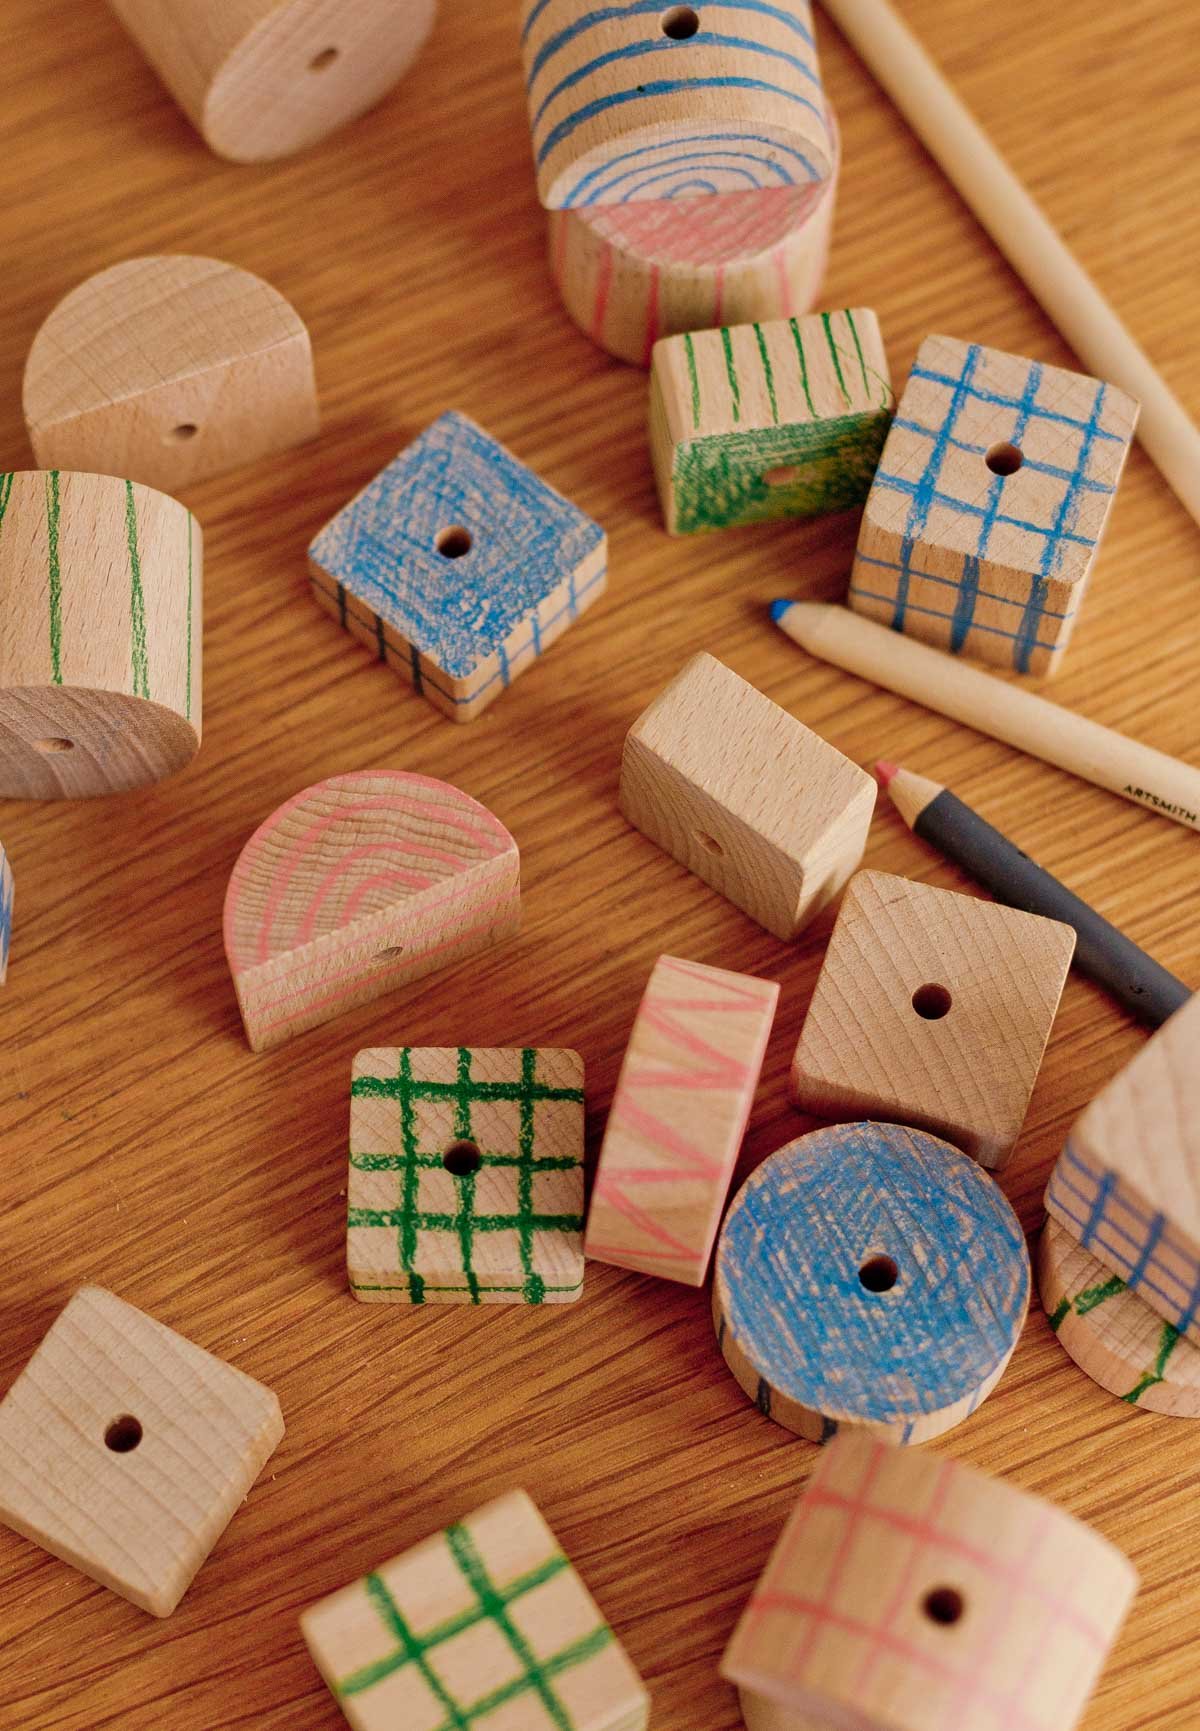
2. Draw or paint on blocks.
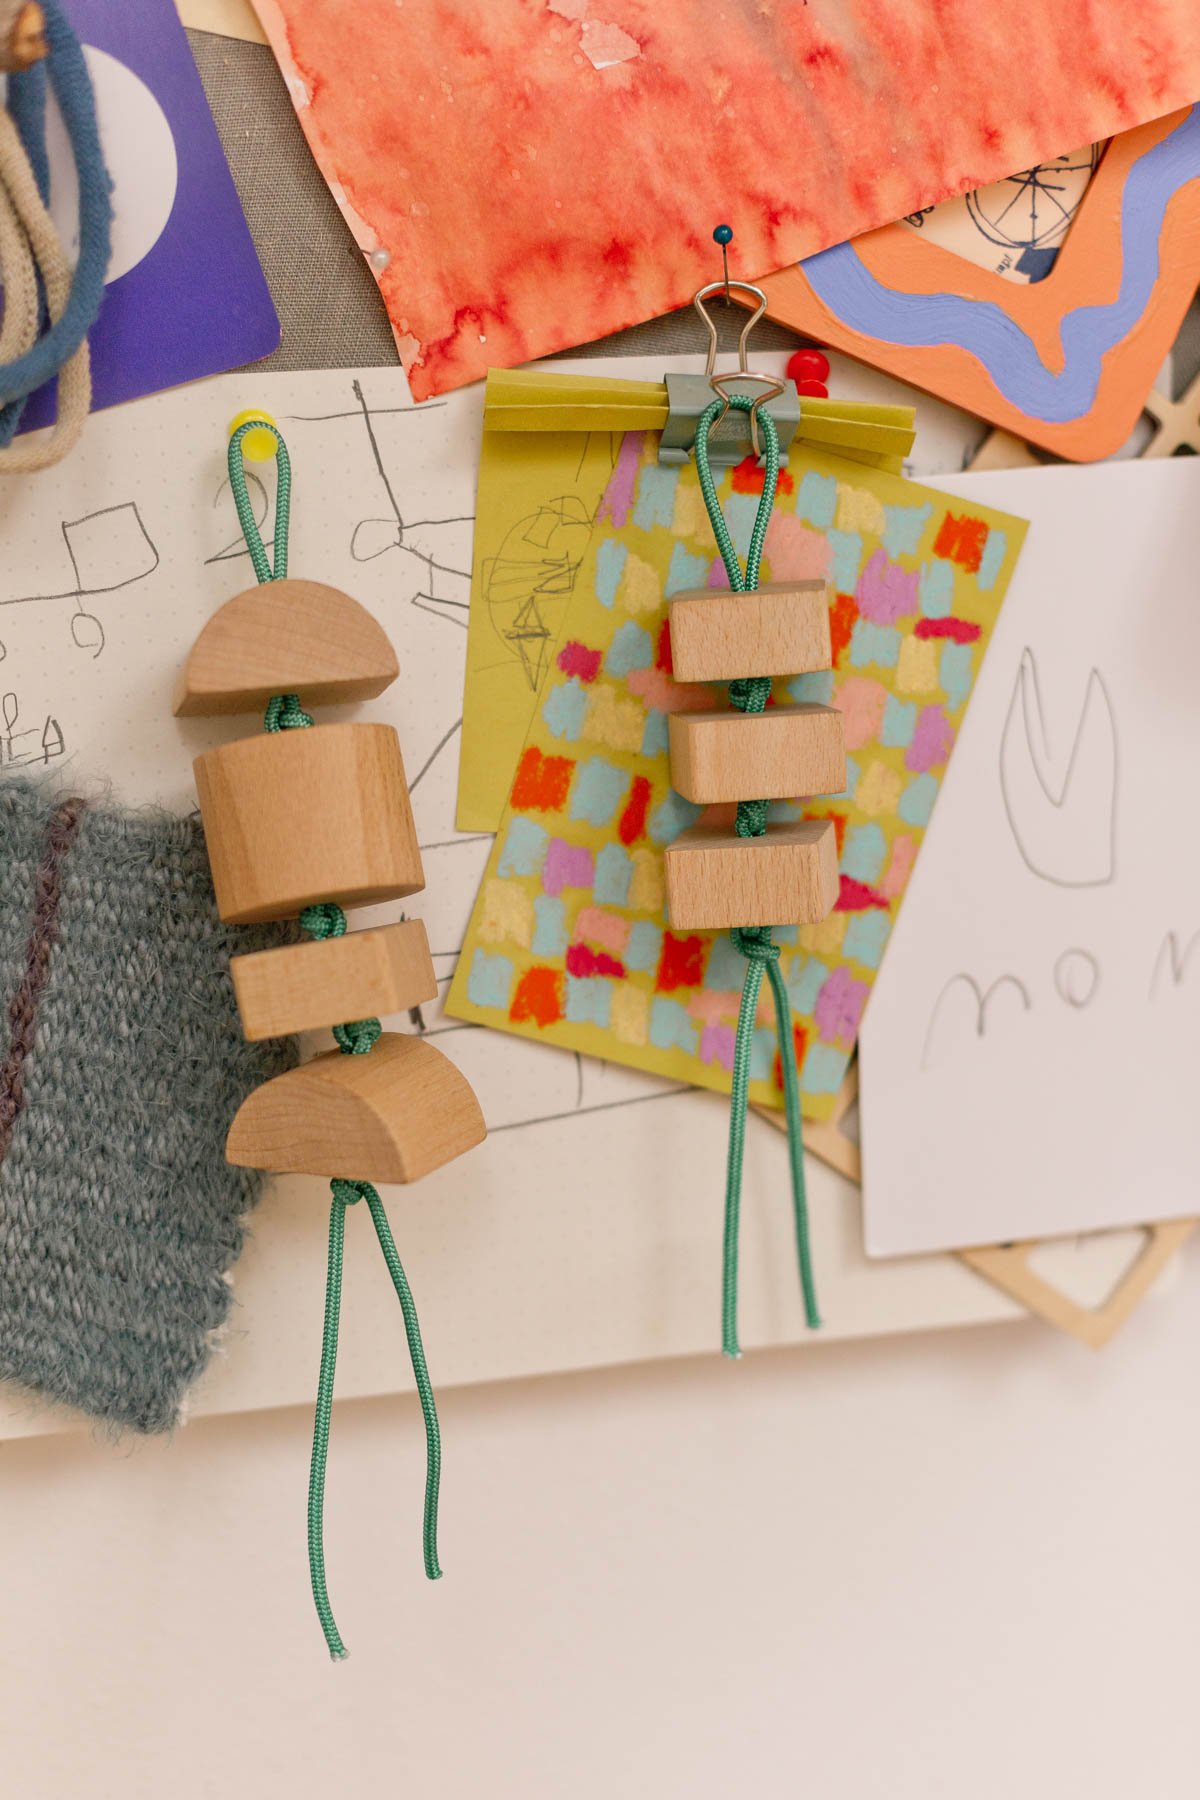
I love the shapes of these blocks and I think they look cute on their own, without any doodles. BUT I also think it adds a little more charm to have little patterns and doodles on the blocks.
This is the perfect job for children. They never get tired of doodling on all the things, right?
3. Seal the wood blocks.
If you’re using colored pencils or something similar, you may want to seal the wood blocks after the drawings are complete. You can use a matte medium, Mod Podge, or even aerosol hairspray (strange, but it works) to keep your drawings in place / seal them in.
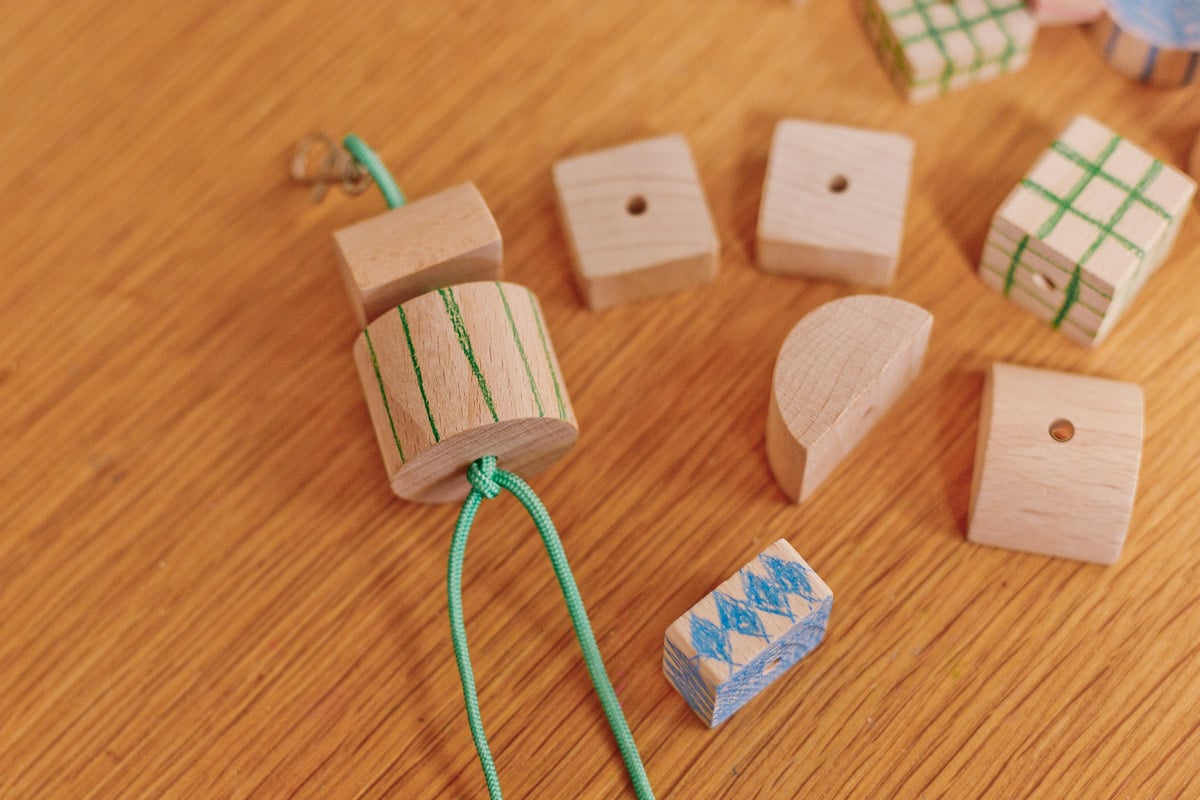
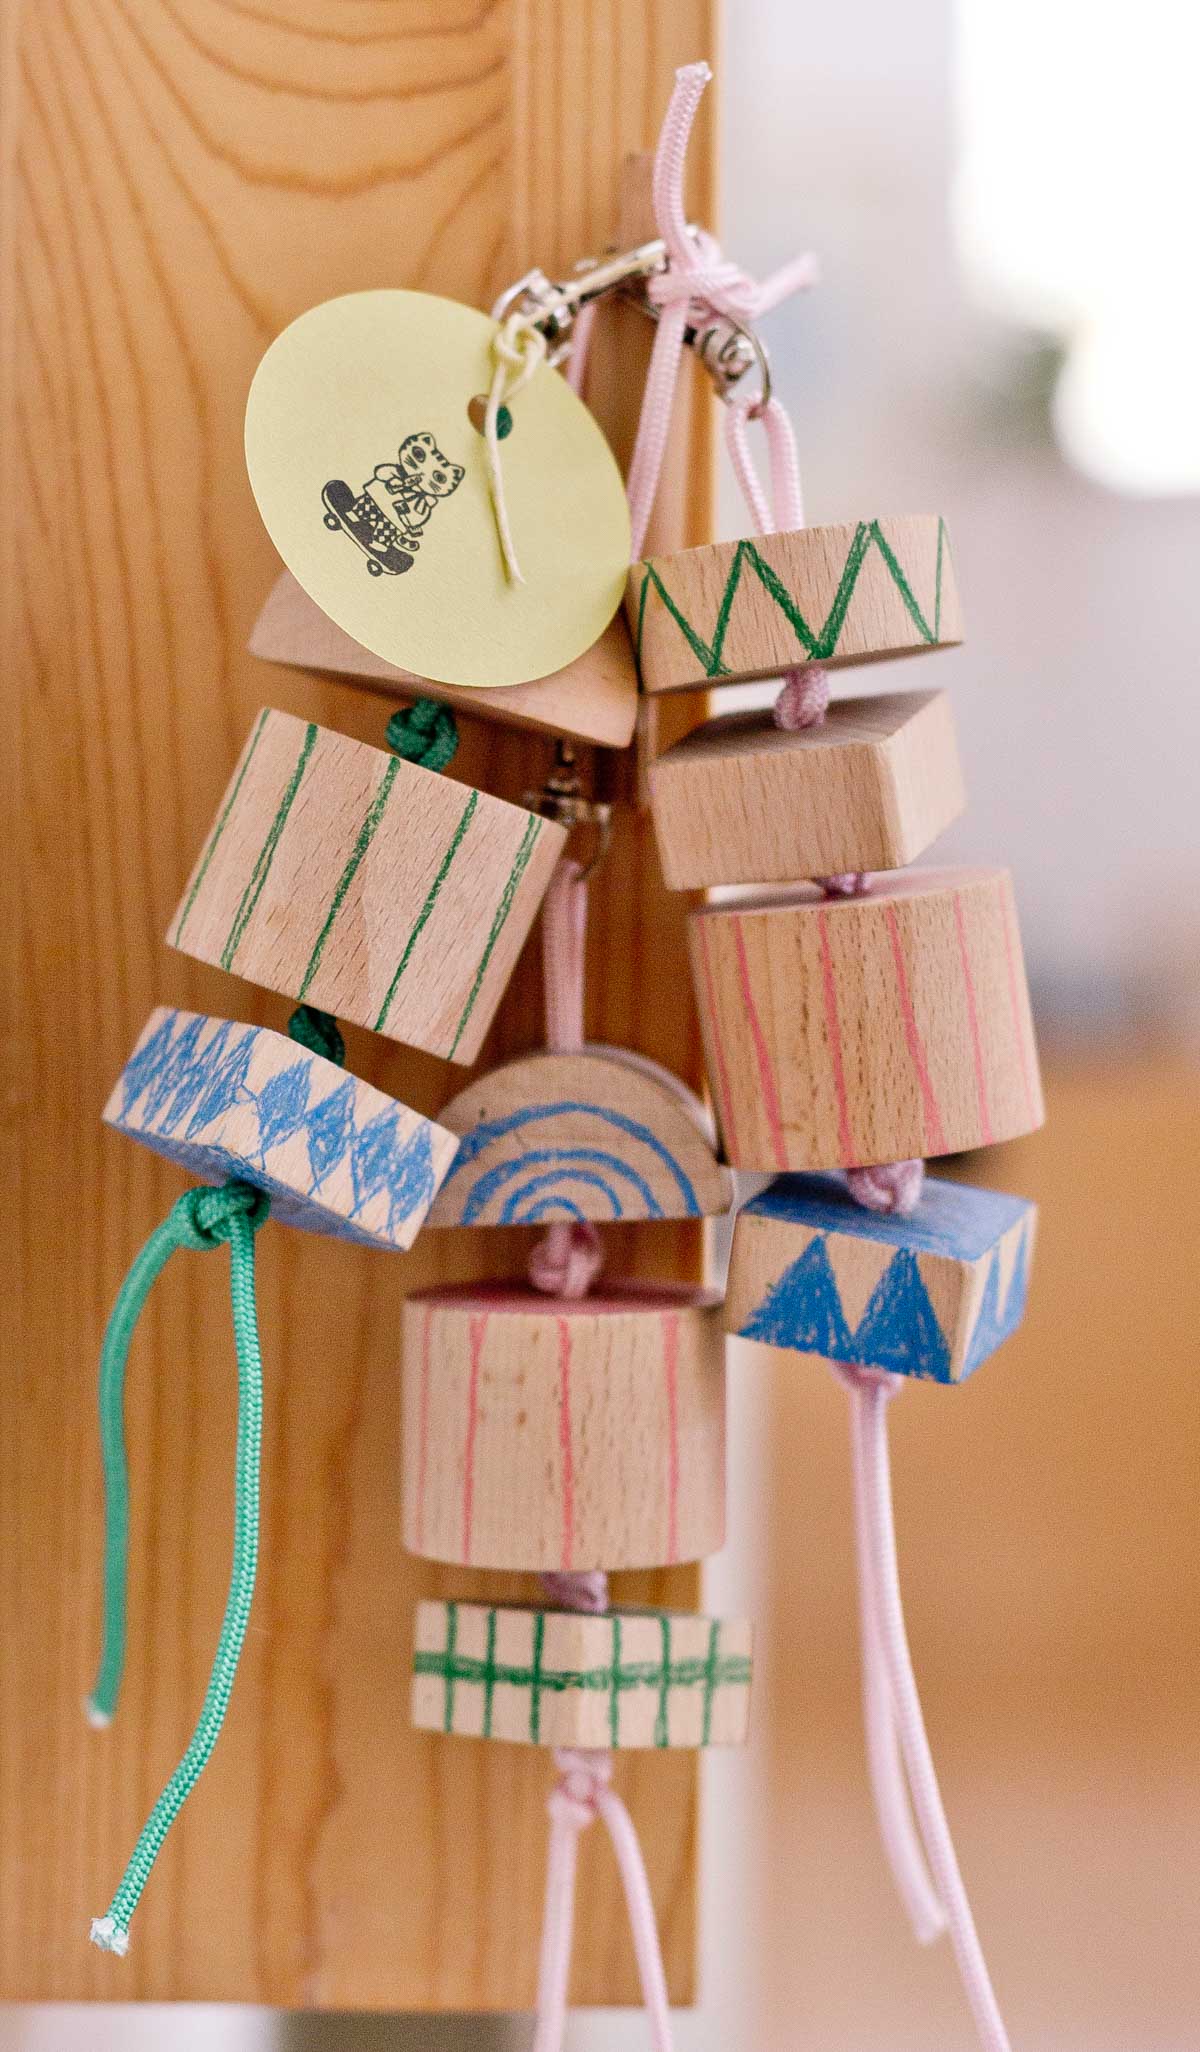
4. String the wood blocks onto the cord.
String the first wood block onto both ends of the cording and push it (almost) all the way up to where the clasp is. You’ll want to leave anywhere from a half inch to a full inch at the top, creating a loop.
Then, take the two ends of the cording underneath the block that was just strung on, and tie it in a knot as close to the bottom of that wood block as possible.
5. Continue the process and double knot the very end.
You’ll continue this process of stringing blocks and knotting the cord underneath them until you’ve reached the desired length / number of blocks. The very last knot should be a double knot, to keep the beads from unraveling.
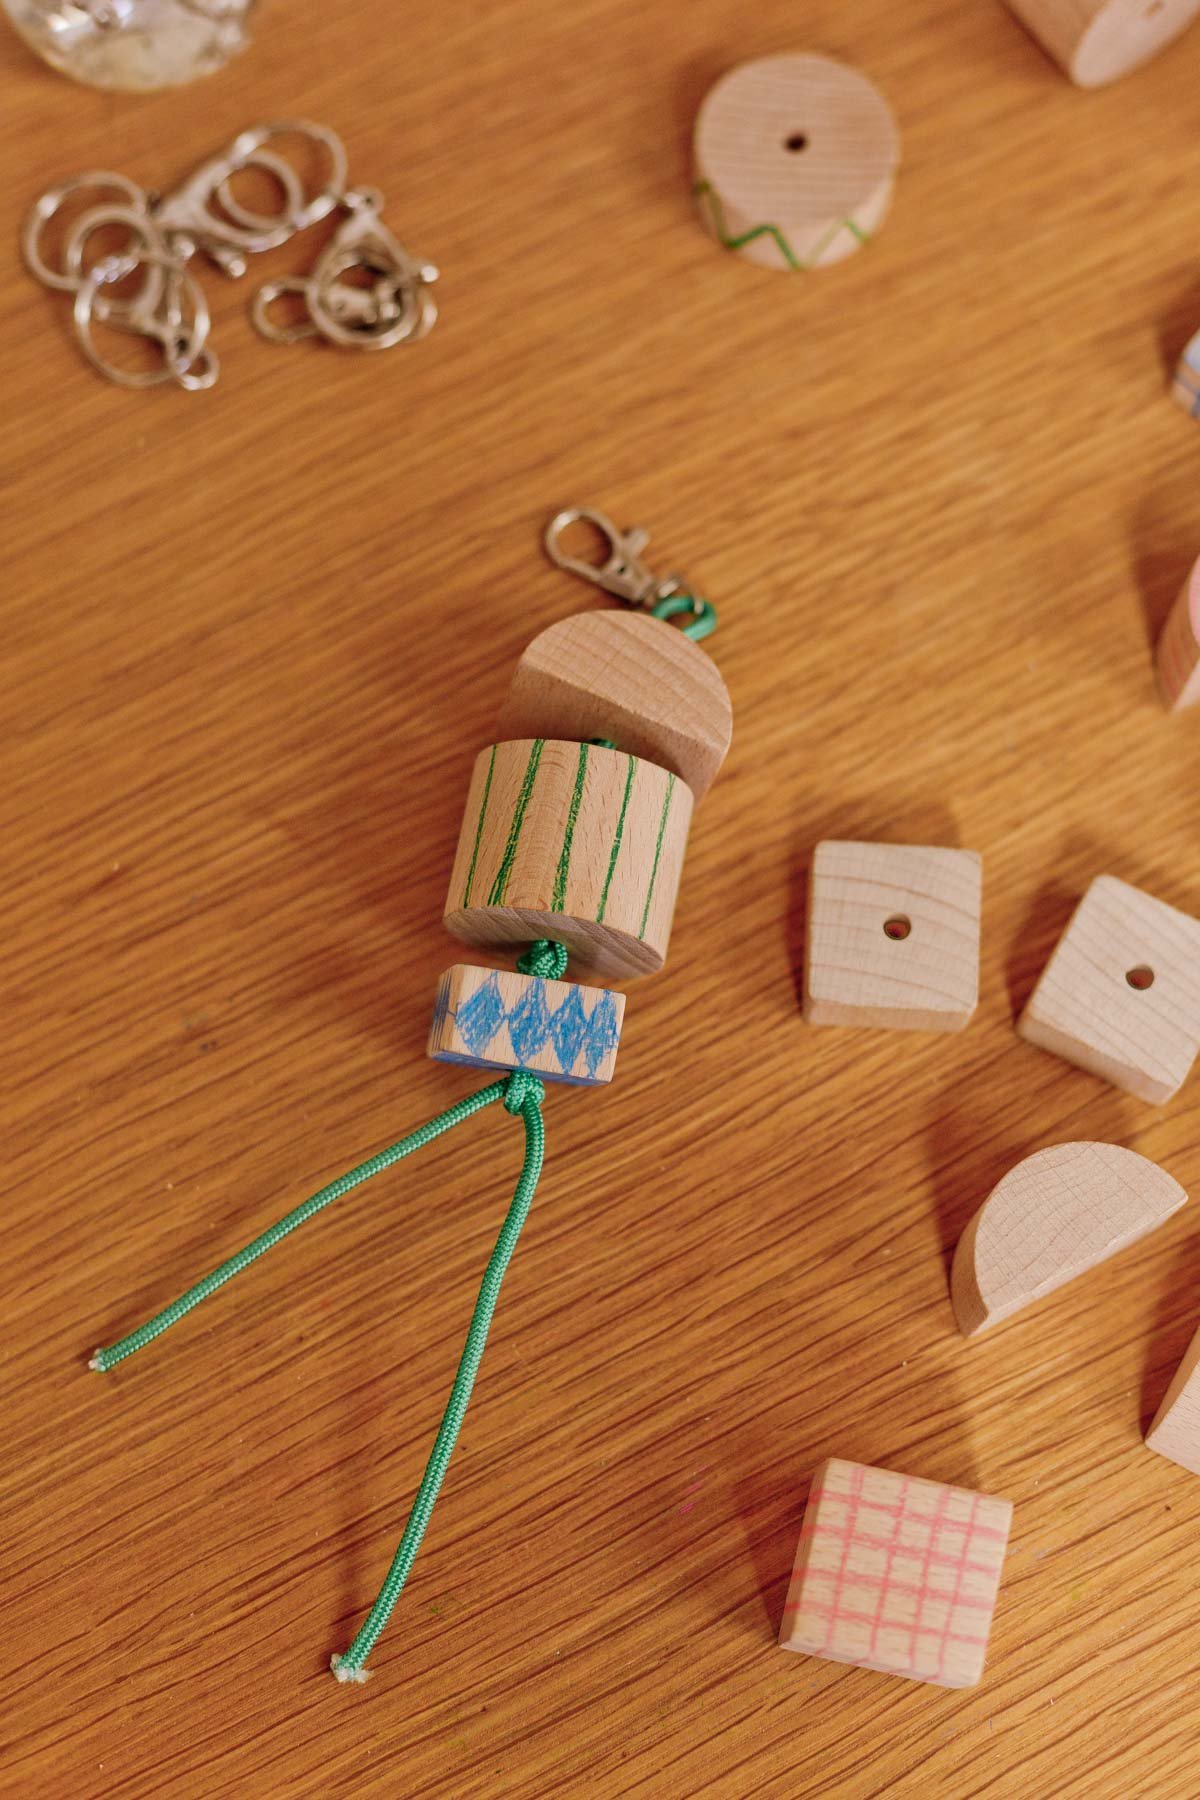
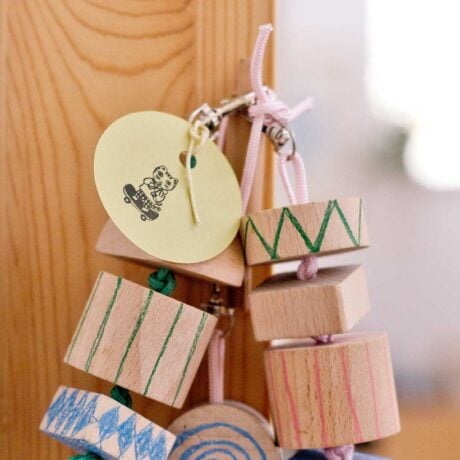
6. Cut off excess cording.
Cut off any excess cording, if desired, and its ready to throw into a party bag as a cute party favor, onto a backpack as a DIY keychain, etc.
More keychain ideas
If you wanted to use these keychains as gifts for a child’s birthday party, you could skip steps 2 and 3, keep all the blocks blank and assemble the keychain.
Then pop the assembled keychains into kids party favors, along with some colored pencils (or DIY colorful crayons), and you’re good to go. A mini craft activity for kids to do at home when the party is over.


Chunky Wood Keychain DIY
These wood block keychains are a fun DIY to try for back to school, Christmas gifts, stocking stuffers, even unique party bag fillers for birthdays. Something that kids could attach to their backpacks, lunchbox, or tote bag that will actually last!
I ended up making 8-10 of these pretty quickly (an hour or two) for a fundraiser at my son’s schools, featuring handmade items. They were affordable to get the supplies for and very easy to make. Win-win!
Along those same lines, I feel like these keychains would be a cute thing to sell at a craft fair too. A low-cost item that gets people checking out your booth. Anyway! Here’s how to make ’em…
- chunky wood blocks If you use wood blocks that don’t already have a hole through the middle of them, you’ll need to drill holes in the blocks first, before getting started with this project.
- thick keychain cording
- lobster clasp keychain parts
- colored pencils or paint (optional)
- sealant (optional)
String a keychain clasp onto cord.
-
Making your own keychain is simple. Start by stringing a keychain clasp onto the cording, at the halfway point. So there is an equal length of cord on each side of the clasp.
-
I have a few different sizes of these lobster clasp keychain parts, but the small ones are the ones I like most. Set aside.
Draw or paint on blocks.
-
I love the shapes of these blocks and I think they look cute on their own, without any doodles. BUT I also think it adds a little more charm to have little patterns and doodles on the blocks.
-
This is the perfect job for children. They never get tired of doodling on all the things, right?
Seal the wood blocks.
-
If you’re using colored pencils or something similar, you may want to seal the wood blocks after the drawings are complete. You can use a matte medium, Mod Podge, or even aerosol hairspray (strange, but it works) to keep your drawings in place / seal them in.
String the wood blocks onto the cord.
-
String the first wood block onto both ends of the cording and push it (almost) all the way up to where the clasp is. You’ll want to leave anywhere from a half inch to a full inch at the top, creating a loop.
-
Then, take the two ends of the cording underneath the block that was just strung on, and tie it in a knot as close to the bottom of that wood block as possible.
Continue the process and double knot the very end.
-
You’ll continue this process of stringing blocks and knotting the cord underneath them until you’ve reached the desired length / number of blocks. The very last knot should be a double knot, to keep the beads from unraveling.
Cut off excess cording.
-
Cut off any excess cording, if desired, and its ready to throw into a party bag as a cute party favor, onto a backpack as a DIY keychain, etc.
If you wanted to use these keychains as gifts for a child’s birthday party, you could skip steps 2 and 3, keep all the blocks blank and assemble the keychain.
Then pop the assembled keychains into kids party favors, along with some colored pencils (or DIY colorful crayons), and you’re good to go. A mini craft activity for kids to do at home when the party is over.